Tuesday, August 7, 2012

Chicken Saltimbocca

I have a lot of sage growing in my garden right now, so I decided to make a saltimbocca.  I'm not a fan of veal, so I went the chicken route.  I started with this recipe and improvised from there based on what I had in my fridge.  It turned out great!


Ingredients

2 chicken cutlets, about 4 ounces each
2 thin slices of prosciutto
2-6 large leaves of fresh sage (depends how big your sage is)
1/2 teaspoon salt
1/4 freshly ground black pepper
1/2 cup flour
2 tablespoons canola oil
1/2 cup dry white wine
1 cup chicken broth

2 cloves garlic, minced
10 oz sliced mushrooms (white or baby bellas, your choice)
6 oz fresh arugula

Directions

Add about a teaspoon or so of canola oil to a large skillet over medium heat.  Once hot, add the sliced mushrooms and cook until they are fairly tender, 8-10 minutes.  Remove them from the pan and set aside.

Pound out your chicken breast so it's fairly flat and nice and long.  Season the chicken with salt and pepper. Place a slice of prosciutto along one side of each of the chicken cutlet slices, and top with a sage leaf. Fold the chicken over to cover the prosciutto and sage.  Press down on the edge.

Carefully dredge the chicken in flour on both sides.  Add the rest of the canola oil to your skillet over medium heat.  Once hot, carefully place the chicken in the skillet. Let them brown on each side (maybe 3-5 minutes).  Be careful when you flip them so that you don't open them up!

Once they are brown, carefully add the white wine and chicken stock to the pan. Stir up any brown bits.  Add your minced garlic. Add the mushrooms back to the pan and let the liquid reduce by half. For me, this took 15-20 minutes. Season your liquid with salt and pepper. Add the arugula to the pan.  It will take up a lot of room but don't worry, it will shrink down quickly.  Once your liquid is reduced to your liking and your arugula is cooked, remove everything from the pan and serve.


Chocolate & peanut butter pie

This recipe turns out quite delicious, I must say!  And it's so easy to make.
It is based on this original recipe here, with some tweaks based on the comments.

Ingredients

1/4 cup powdered sugar
1 cup natural-style, reduced-fat creamy peanut butter 

1 (8-ounce) block 1/3-less-fat cream cheese, softened
1 (14-ounce) can fat-free sweetened condensed milk
12 ounces frozen fat-free whipped topping, thawed
2 (6-ounce) oreo or other crushed cookie pie crusts (reduced fat if you can find it)
3/4 cup melted chocolate chips
half a bag of Reese's Pieces, crushed

Preparation

Combine powdered sugar, peanut butter, and cream cheese in a large bowl; beat with a mixer at medium speed until smooth. Add milk; beat until combined. Fold in whipped topping. Divide mixture evenly between crusts; chill 8 hours or until set (pies will have a soft, fluffy texture).

Melt the chocolate chips in your preferred way (double boiler on the stove, or microwave if you stop and stir often!  (I set mine on fire first time around).  Once melted, drizzle evenly over the two pies.  Sprinkle with the crushed Reese's Pieces.  Chill until you serve.


Image coming soon!

Monday, July 16, 2012

Moroccan-Style Turkey and Chickpeas

The original version of this recipe from Cooking Light called for ground lamb, not turkey.  I'm kind of weird about lamb - every time I try it I'm not really a fan, except when it's ground and covered in spices (usually Indian spices).  I would have made this recipe with ground lamb, if my closest grocery actually had any....that day they did not. So I subbed in ground turkey and it was just fine.  This was a tasty meal - very easy to prepare and great flavors.  I ate it leftover the next day for lunch and it was still great.

Ingredients

1 pound lean ground turkey (or lamb, if your store has it)
2 teaspoons extra-virgin olive oil
2 cups sliced onion
1/2 cup (1/4-inch) diagonally cut carrot
3/4 teaspoon ground cumin
3/4 teaspoon ground cinnamon
1/2 teaspoon ground coriander
1/4 teaspoon ground red pepper
2 cups fat-free, lower-sodium chicken broth
1/2 cup golden raisins (I left these out.  I hate raisins.)
3 tablespoons tomato paste
1 1/2 tablespoons grated lemon rind
1/4 teaspoon salt
1 (15 1/2-ounce can) chickpeas (garbanzo beans), rinsed and drained
1/2 cup chopped fresh cilantro
1 tablespoon fresh lemon juice

Preparation

1. Heat a large nonstick skillet over medium-high heat. Add turkey to the pan; cook 6 minutes, stirring to crumble. Remove turkey from pan with a slotted spoon. Discard drippings. Add oil to pan; swirl to coat.

Add onion and carrot to pan; sauté 4-8 minutes. Add cumin, cinnamon, coriander, and pepper; sauté 30 seconds, stirring constantly. Add reserved turkey, broth, and next 5 ingredients (through chickpeas); bring to a boil. Reduce heat, and simmer until mixture thickens.

Remove from heat. Stir in cilantro and lemon juice.  I served it with a small amount of basmati rice to help soak up the liquid.


Tuesday, May 22, 2012

Chicken amore - stuffed chicken dish

This recipe is courtesy of Hungry Girl.  Some of her ideas are hit and miss, but this one is definitely one of the best.  It's also pretty easy to make.

Ingredients  
1 large portabella mushroom cap, sliced (or several small ones sliced)
Two 5-oz. raw boneless skinless lean chicken breast cutlets, pounded to 1/2-inch thickness
1/8 tsp. salt
1/8 tsp. black pepper
1/8 tsp. garlic powder
2 wedges The Laughing Cow Light Creamy Swiss cheese, room temperature
1/3 cup jarred roasted red peppers, drained
 and sliced
6 large leaves fresh basil, or more for garnish
1/2 cup creamy tomato soup with 4g fat or less per serving (like Amy's Chunky Tomato Bisque)
1/4 cup fat-free sour cream (Or fat free Greek yogurt, which is what I use)
1/8 tsp. Italian seasoning

Directions


Preheat oven to 350 degrees.


Season chicken cutlets with salt, black pepper, and garlic powder. Lay the cutlets flat, side by side. Spread a cheese wedge over each cutlet and evenly top with red peppers and basil. Place the mushroom slices horizontally over the basil.

One at a time, tightly roll the chicken cutlets up from the bottom and around the filling; secure with toothpicks. Place the chicken rolls in a baking pan sprayed with nonstick spray, seam sides down.


Cover the pan with foil, and bake in the oven for 20 minutes.


Carefully remove foil and return pan to the oven, uncovered, to bake until the chicken is cooked through, about 15 minutes.


Meanwhile, to make the sauce, combine tomato soup, sour cream, and Italian seasoning in a microwave-safe bowl. Mix well.


Once the chicken is fully cooked, cover the sauce and microwave for 1 minute; stir well. Remove toothpicks from the chicken rolls, plate them, and evenly cover with the sauce.


Garnish with additional basil leaves, if you like, and enjoy!

I have a picture I took of the finished product, but trust me when I say it doesn't do it justice.  So, a good picture is forthcoming! 

HG stats:
PER SERVING (1/2 of recipe, one stuffed cutlet with sauce): 271 calories, 4.5g fat, 720mg sodium, 13.5g carbs, 1g fiber, 8.5g sugars, 37.5g protein -- PointsPlus® value 6*

Thursday, January 26, 2012

Lightened up cheeseburger mac casserole

So back in the day, when I was first starting out cooking, I was a fan of making the Hamburger Helper meals. They were relatively easy, one pot meals and all you needed to add was raw hamburger.  Of course, they are based on sauce partially coming from a powder and they all processed out the wazoo, but hey, a cook's gotta start somewhere.

Because of this, I have a special place in my heart for when someone "fancies up" what could have been a Hamburger or Tuna Helper meal (sometime I'll post my take on Emeril's tuna tetrazini).  

This is another of those recipes.  However!  This particular recipe also shows the importance of always reading the online comments of those who have tried it before you.  Sometimes people's postings just show that they are idiots that don't know how to cook but sometimes they are quite valuable.  This recipe is from Hungry Girl and I actually saw her make it on her show.  On the show, she threw everything in a crock pot and 8 hours later on low/4 on high, it came out looking tasty.  But if you read the reviews of practically everyone who has made it, it comes out as disgusting mush.  This has to do mainly with some slow cookers running hotter than others (I found I couldn't even cook meat in my old one on high without it coming out tough!) but it's good to know.  Other commenters on the FN site mentioned that they had just cooked everything on the stove top and it worked out much better.  So, I took that route.  I also made a few substitutions based on the ingredients I could find/already had available.  And it turned out delicious!!  If you do want to make it her way, be my guest....but don't be surprised if you get mush at the end.

My version of her cheeseburger mac casserole

Ingredients
5 oz. (about 1 1/4 cups) uncooked elbow macaroni (I used a mix of whole grain macaroni and quinoa macaroni)
16 oz. raw lean ground turkey (I used 93% lean)
3 tbsp. ketchup (I have the fancy "unsweetened" ketchup)
1 chopped onion
Two 10 oz. frozen cauliflower and low-fat cheese sauce (like the kind by Green Giant) packages (the original recipe calls for one 24 oz. pack but I searched 2 stores and they didn't have that size)
1 wedge The Laughing Cow Light Creamy Swiss cheese
4 oz shredded Cabot 75% reduced fat sharp cheddar cheese
2 scallions, thinly sliced
salt and black pepper
Hot sauce (optional)

Preheat your oven to 375.

Combine the turkey and onion in a saucepan over medium heat.  Meanwhile, cook your pasta to al dente in another pot.  Stir the turkey and onion until both are cooked through thoroughly.  Take your frozen cauliflower packages out of their boxes, cut a hole in the plastic pouches, and microwave them till heated.

Once the turkey and onion are cooked, add the ketchup to the pan and stir well.  Then carefully stir in your Laughing Cow wedge, green onions, cauliflower and cheese sauce, and pasta.  Add salt and pepper.  Add in all but 1/4 cup of your shredded cheese.  Then, pour the entire mixture into an 8x8 glass baking pan.  Sprinkle the remaining cheese on top and bake until melted and gooey, about 15 minutes (or you can save this step and serve it right then and there).

We ate it with a bit more salt and pepper to taste and some hot sauce!  It was delicious.

Not the prettiest picture ever, but you get the idea.


Thursday, January 12, 2012

Indian Fish Coconut Curry

So for some reason, whenever I try a variety of dishes at Indian buffets, I dislike all but one of them.  And sometimes all of them. If I order a specific entree, I'm usually safe and it tastes great.  And if I make Indian dishes from scratch at home, I enjoy them.  Maybe Indian buffets are just crappy.  

I made this particular recipe a few months back and was a little generous with the Indian chili powder and so it was *very* spicy.  I made it because I had made some homemade roti bread as well (having made paneer the day before) and I wanted a good curry to go with it.  I didn't take any quality pictures of this curry (I need to use my good camera for such things in the future!) so there is no picture here.  But here's the source recipe, which has a nice picture.


Ingredients:


1 pound boneless, skinless fish fillets, cut into chunks.  Use the fish of your choice: mahi mahi, grouper, flounder, tilapia, or even shrimp would be good.
1/2 pound of cubed paneer cheese (totally optional)
1 tablespoon vegetable oil 
1/2 onion, chopped 
1 teaspoon grated 
fresh ginger 
2 cloves garlic, finely minced
1 fully ripe tomato, diced or 1 1/2 cups canned diced tomatoes 
1 teaspoon garam masala 
1/4 teaspoon chili powder (cayenne) (I used Indian chili powder, extra hot, that I got from the Asian market.  And I maybe used around 2 teaspoons of it. Don't do this unless you like it spicy!!) 
1/2 teaspoon saltfreshly ground black pepper
1 cup coconut milk (I used low fat)
 1/4 cup water 


Directions:


Heat a medium saucepan over medium heat and swirl in the oil. When the oil is heated, add the onion, ginger and garlic. Turn the heat to medium-low and let the aromatics cook slowly. Saute until very fragrant, about 5 minutes. Take care not to let it burn!


Add the tomato and saute for another 3 minutes, stirring frequently. 


Add the garam masala, chili powder, salt and pepper. Stir to combine and cook for 2 minutes. This is the masala (spice base).


Turn the heat to medium-high. Pour in the coconut milk and the water. When the mixture comes to a good boil, add in the fish and cook for 4 minutes or so, until the fish is cooked through. Fish never takes very long.

Serve with some basmatic rice, naan, or roti (or all three!).

Tuesday, January 10, 2012

White chili

Two posts in a row!  And both with chili as a theme.  I'm on a roll.  Actually, I just really like chili.  I've made just about every kind of chili: Cincinnati style, traditional Texas, all bean chili, mushroom and bean chili, "Julie" chili (mix of stew and ground meat and it has beans too), and now white chili.  I even entered my Julie chili in a local chili-cookoff, but sadly, I didn't place.  There's always next year!

Today's chili post is about the white chili.  It's called white because it's typically made with chicken or turkey and does not contain tomatoes or (much) chili powder.  I went through some different recipes and finally decided to make this one as my starting point, changing things up, of course.  The great thing about white chili, and all chili really, is that you can make it hearty and flavorful without it being full of fat and calories.

Ingredients:
 1 medium onion, diced (about 1 1/2 cups)
2 stalks celery, diced (about 1/2 cup)
2 large poblano peppers, diced (if they are especially spicy, you may want to seed them. Mine were not)
3 cloves garlic, minced
1 tablespoon ground cumin
1 teaspoon ground coriander
1/4 teaspoon cayenne pepper, more to taste
1 pound ground white meat turkey (I used 93% lean)
2 (15.5-ounce) cans white beans such as cannelini, preferably low-sodium, drained and rinsed (also called white kidney beans)
1 small can of green salsa (salsa verde, medium heat)

1 small can of diced green chiles (I used mild, but this is your preference)
2-4 cups low-sodium chicken broth (see below)
1 teaspoon dried oregano (use Mexican if you can)
Kosher salt 

Optional toppings:
1/4 cup nonfat plain Greek-style yogurt
2 tablespoons chopped fresh cilantro leaves
Lime wedges
Reduced fat shredded Mexican cheese blend
Baked tortilla chips

This recipe has a great deal of flexibility to it.  If you can plan ahead and buy all of the ingredients the night before, you can simply throw everything (except the beans) in the crockpot in the morning and let them cook 7-8 hours.  You would then add the beans in the last hour or two of cooking.  If you go this route, your turkey will be incredibly soft and completely fallen apart, kind of like a ragout.  If you prefer a meatier version, brown your ground turkey on the stove top first before adding it to the crock pot.  If you are going the crock pot route, I would start out with 1-2 cups of chicken broth when you throw everything in the crock pot.  Crock pots don't need a lot of liquid to cook, and it won't evaporate during the day.  You can always add more liquid later but it's more of a pain to add too much early on and then try to get it to evaporate.**

Alternatively, you can make this whole thing on the stove in about an hour.  First add about a tablespoon of olive or canola oil to a dutch oven or other soup pot over medium heat.  Brown your ground turkey and remove it from the pot.  If necessary, add another tablespoon of oil. Add the celery and onions and cook until they are starting to get translucent, around 5 minutes.  Add the garlic and poblano peppers and cook another 5 minutes. Then dump your ground turkey back in, along with your cumin, coriander, green salsa, oregano, and chicken broth.  Again, start out with 1-2 cups of chicken broth, only adding more if needed.  In the last 15 or so minutes, dump in your beans.  Then add cayenne and salt to taste.  (Note: if you use low sodium or homemade chicken broth, chances are that you will have to add a surprising amount of kosher salt at this point for it to get up to the proper taste. Or maybe that's just me). I also like to add more of the other spices at this point to brighten the flavors.  Once it's all come together, the veggies are cooked, and it's at the right consistency, ladle into bowls and serve with whichever optional toppings above float your boat.

**One trick with chili that I learned from Alton Brown is that you can crush some tortilla chips up into the chili to thicken it somewhat.  Or you can use masa harina, but I know that I certainly don't have that hanging around my kitchen.

White chili with cheese on it.

Monday, January 9, 2012

Cincinnati chili dip

So with the holidays, I have many recipes to share with you...but first I thought I'd share the easiest one ever.  I made this for New Year's Eve.  It had been several years since I had it and it was every bit as delicious as what I remembered!  Of course, the version I made was lightened up and therefore slightly less bad for you than what I had in my youth.

So this brings me to - Skyline chili dip!  Skyline Chili is a very special kind of chili found in Cincinnati, Ohio.  It is in fact known as "Cincinnati style" chili.  Now, I grew up on this stuff so I think it's wonderful, but for those expecting a traditional chili....well it's definitely different.  It's thin and soupy, the meat is super tender, and you can taste cloves instead of the normal chili powder as a dominant flavor.  You can read more about it here.  I always tell people to not expect a regular chili when they try it as it is really quite distinct.  If you go in expecting a thick Texas chili I can imagine the surprise.

Now that I'm in North Carolina I can't get my beloved Skyline fresh, but they do sell it frozen and in cans at Kroger.  I also have a knock-off recipe that I've made which is pretty good - I'll post that here someday.  But today, the dip!

Ingredients
1 can of Skyline chili
12 ounces of reduced fat cream cheese (also called Neufchatel cheese), softened
1/4 cup finely diced onions
8 oz reduced fat finely shredded mild cheddar cheese

Procedure
Smear the cream cheese evenly across the bottom of an oven safe pan (I used an 8 x 8 glass baking dish).

Sprinkle the onions evenly over this.

Spread the chili evenly over the onions.

Sprinkle the cheese evenly over this.

Bake at 350 until the cheese has melted.  Serve with tortilla chips.  So good.
I didn't take a picture when I made it on New Year's but here's one from the internet:


Thursday, November 17, 2011

Chickpea salad

Can I just say that I love chickpeas (also known as garbanzo beans)?  They are great in hummus, in soups, and in a cold chickpea salad.  Now, I need to go on record to say that I hate macaroni salads, chicken salads, and 3/4 of potato salads.  I'm not sure why exactly but something about them just grosses me out.  Maybe it's the ice cold mayonnaise mixed with cold veggies. Chickpea salad, however, is delicious. And mayo free.

I found several recipes online, and finally decided upon this one, but then changed it up anyway. I'm wacky like that.

Ingredients
2 15-oz cans of chickpeas (usually found with the other beans but my local grocery had them with the canned vegetables...no idea why)
2 cups diced English cucumber (the English kind are usually wrapped in plastic wrap and have less seeds. If you can't find it, just use a regular cucumber and scoop out some of the seeds before chopping)
1 cup diced tomatoes, seeded (seeded means squeezing out all the juice and seeds)
1/2 of a red bell pepper, finely chopped
3/4 cup finely diced red onion
1/2 cup fresh cilantro, minced
2-3 tablespoons minced basil (I no longer have fresh, as my plant died from the frost. So I had to use dried basil. I used about 2 teaspoons)
4 garlic cloves, minced
1 teaspoon salt
4 tablespoons freshly squeezed lemon juice
2 teaspoons Dijon mustard
4 teaspoons rice vinegar
4-5 tablespoons extra virgin olive oil
freshly ground black pepper

Rinse and drain chickpeas. In a medium bowl, stir together the cucumber, tomato, red bell pepper, red onion, and herbs. Carefully stir in the chickpeas.

In a small bowl, mash together the garlic and salt. Whisk in the lemon juice, mustard, vinegar and olive oil. Season to taste with pepper. Toss the dressing into the chickpeas and vegetables. Let it sit for at least an hour in the refrigerator (mine sat overnight). Give it one final toss before serving.

Wednesday, November 16, 2011

Paneer cheese

My husband, Joe, has made mozzarella cheese a few times now.  It turns out that it's kind of a particular process with several steps, and you really have to be careful about measurement of ingredients and temperature.  It also can be more challenging to try to find citric acid powder and rennet tablets.

So imagine my delight when paneer was so easy to make in comparison!  Paneer is a white, hard cheese found in many Indian dishes. It kind of looks like tofu cubes in some of the curries it's made in, except, well, it tastes like cheese!  You can also pan fry paneer (similar to tofu) if you want it browned.

So here we are, to the easiest cheese recipe ever!

Ingredients:
1/2 gallon of milk (you can use whole milk, but I used 2%. Next time I may try 1%.  They say that skim milk is not recommended though)
1/4 cup fresh lemon juice (I think that fresh squeezed works best. If you choose to use the bottled stuff, you may have to play around with the recipe a bit)

Directions:

Heat the 1/2 gallon of milk in a saucepan over medium heat.  Be sure to stir it often, so you don't burn the milk on the bottom.  When it finally comes to a good boil, remove it from the heat and pour in the lemon juice.

Gently stir the lemon juice in.  It will start to curdle the milk immediately, and separate it into curds and whey.  Gently stir for a bit, and then let it sit for 5-10 minutes.

Gently stir once more.  You should have a lot of curds now!  Put a double layer of cheesecloth over a fine mesh strainer and place them both over a bowl large enough to hold all of the whey liquid.  Carefully pour the curds and whey from the saucepan into the cheesecloth.  Squeeze all of the liquid from the cheesecloth that you can.  Either toss the whey or use it another recipe (I used it the next day to make roti bread).

Take your curds in the cheesecloth and gently rinse over the sink with tap water.  Squeeze to get all the liquid out, and then put the cheesecloth and strainer back over the bowl and let it sit a few minutes.  I put a paper towel and a heavy can of beans over top to help force liquid through.

Then, put some paper towels on a dinner plate, put your cheesecloth and curds on top, and cover with some more paper towels.  Place another dinner plate on top, and then on top of that, some heavy canned goods (I used a big jar of spaghetti sauce and 4 cans of beans).  Leave it out like this for 1-2 hours, then wrap in plastic wrap and refrigerate.  

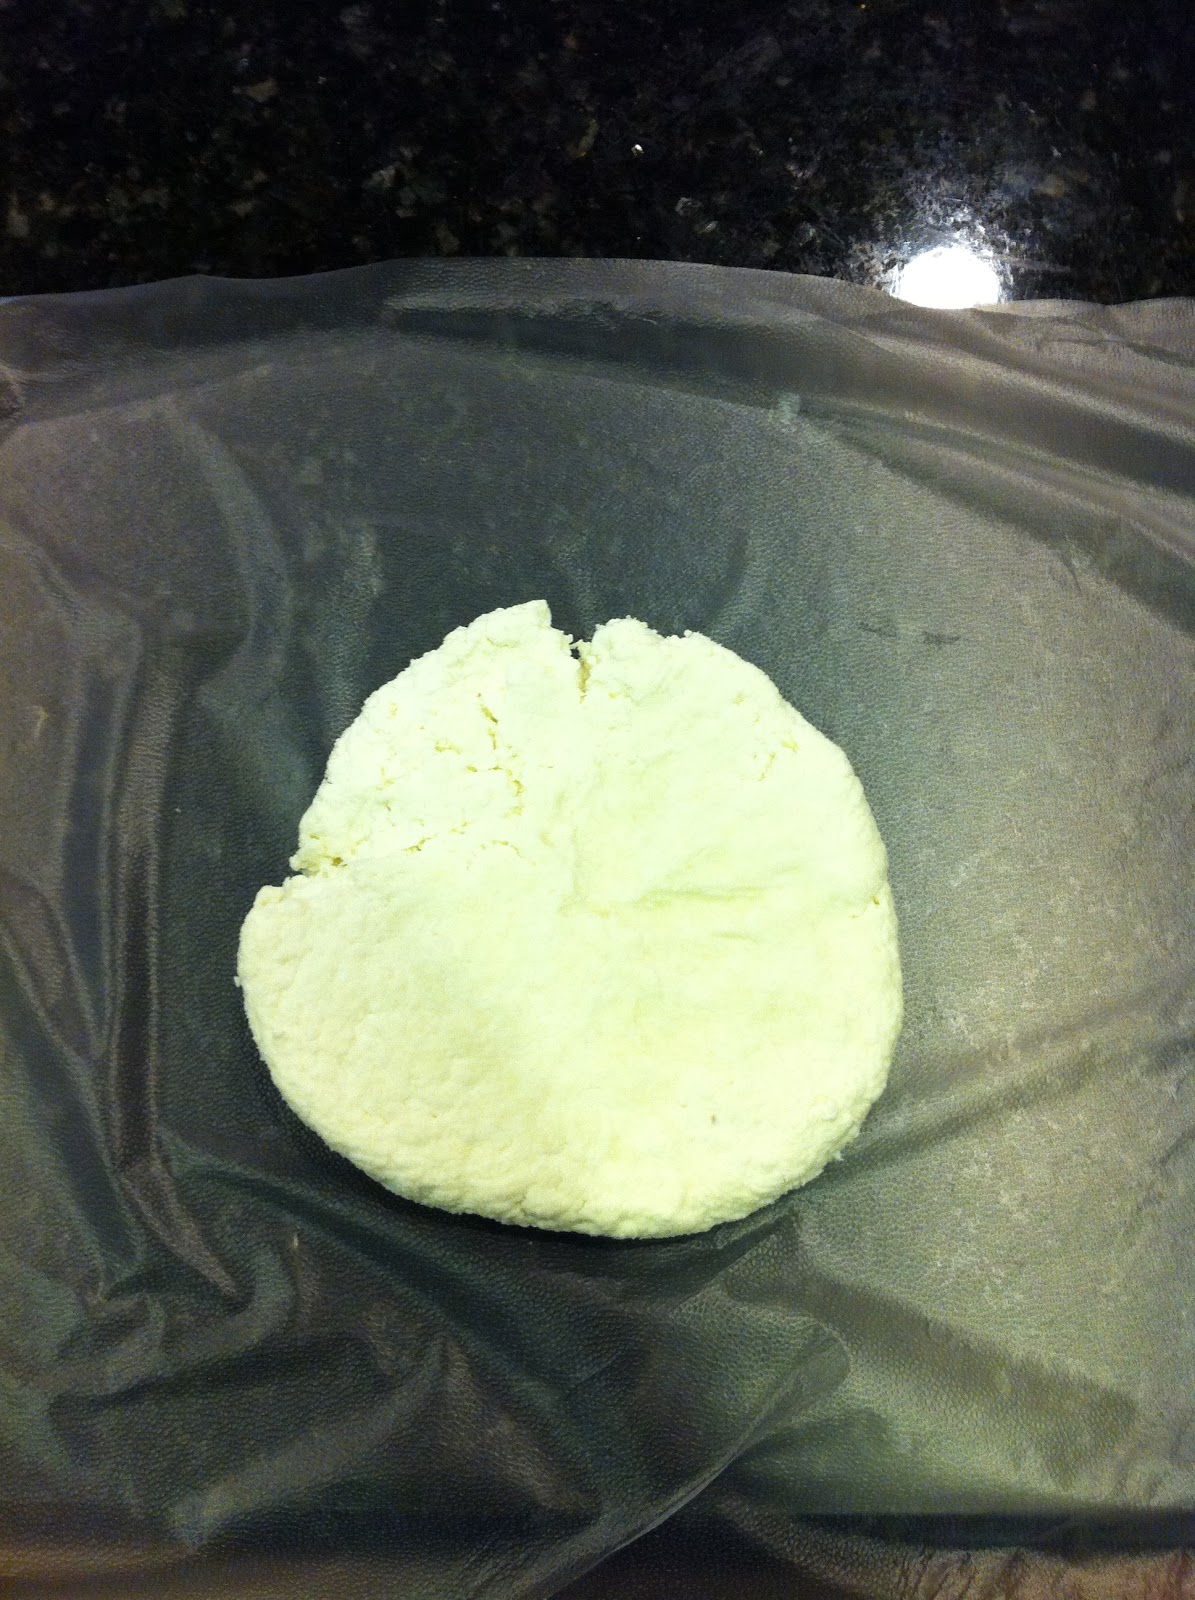
freshly made paneer!


You can then use the paneer in your favorite paneer recipes.  One of my faves is palak paneer!

Saturday, October 22, 2011

Sopa de Mariscos (seafood soup)

Growing up I was always comfortable baking cookies from scratch but I relied on some supermarket helpers for most other things: cake and brownies from box mix, hamburger helper, Kraft Mac n Cheese.  I guess you could call it the Sandra Lee semi-homemade approach (though I should go on the record to say that woman terrifies me).  I wasn't comfortable branching out and making things from scratch until probably late in my undergrad years and then in grad school.  And then I had a lot of missteps along the way.  My early philosophy was that if I didn't have an ingredient, I'd be "creative" in substituting another ingredient in.  I found out the hard way that you should never, ever do this unless you really know what you are doing.  (I still remember the roast pork I made where I subbed white sugar for brown.  Man was that gross.)  Joe was always highly suspicious when I tried something from scratch, because I was notorious for my bad subs.

We went to Cancun in 2002 and while there I had the most amazing seafood soup, or sopa de mariscos.  Spicy, flavorful, and so delicious.  And it had baby octopus in it that I actually liked.  So a few years later, I stumbled upon this recipe on the Food Network.  It turned out amazing, and was the first thing I made from scratch that Joe said was actually wonderful.  Ironically, when I made the soup a second time I realized that I had actually messed up one of the steps - adding all of the sofrito to the soup when it says to add 1 cup.  But I really like the thickness it has by adding the whole thing so I make it this way on purpose now!   I find this recipe (making the sofrito, and then the soup) to be time consuming, so be prepared if you make it all in one night.  You can save some time by making the sofrito in advance.

So, first, the sofrito. A sofrito is a base for many dishes, including soup.

Ingredients:
1 ounce bacon (about 1 strip), torn into pieces (or you can leave this out to make the dish pescatarian)
1 tablespoon olive oil
1 cup chopped red bell pepper
1 cup chopped yellow bell pepper
1 cup chopped red onion
4 cloves garlic
1/4 teaspoon minced habanero or Scotch bonnet (or other hot pepper)
1/4 teaspoon minced jalapeno
Pinch saffron (saffron can be really expensive so if you aren't willing to spring for it, leave it out or put in paprika for similar color - but not flavor)
6 to 8 ounces dry white wine
1/2 cup cream, if desired (or fat free half and half)

In a sauce pot set on medium, cook the bacon in the olive oil for 30 seconds. Add red and yellow peppers, onions, and garlic, and saute until soft. Add the habanero, jalapeno, and saffron, cook for 1 minute. Add the wine and cream if desired. Reduce by 1/4 and cool a bit.  If you have an immersion blender, it really comes in handy here.  I like to blend it so that there are still some veggie chunks in there.  If you don't have an immersion blender, feel free to use a food processor or blender but please be careful if the liquid is still really hot.  Don't need any sofrito explosions.

Then, you'll want to start making the soup itself.

Ingredients
all of the sofrito, recipe above
2-4 cups fish stock or clam juice (I really like the seafood bullion cubes for this but they are hard to find. Otherwise I just use some seafood stock and clam juice)  I say 2-4 cups because this will vary depending on how thick you want the soup, how much seafood you add, etc.
Seafood of your choice - sometimes you can find a frozen mix of seafood at the grocery - if so, great, use that. If your dining partners aren't as adventurous and don't like octopus and calamari, then you can just use all shrimp, or a white fish like cod.  Or you can be fancy and use mussels and clams.  It's really up to you.  One time I added lobster!
1 tomato, small diced
1/2 cup yellow pepper, small diced
1 lime, juiced
1/2 cup cilantro, chopped
Salt and pepper, to taste

Directions


In a deep saute pan or fry skillet combine sofrito with fish stock or clam juice on medium low heat whisking frequently until heated through. Add the tomatoes and yellow pepper. At this point I usually let it simmer around 30 minutes.

Then, add your seafood of choice (fish and seafood never take long to cook - only a few minutes.  If you are using shellfish, cook until they open  - and if any don't open, toss them). Just before serving, stir in lime juice, cilantro, and salt and pepper, to taste.

This soup is great with some crusty bread.  I do have a photo of the finished soup but the picture really doesn't do it justice.

Thursday, October 6, 2011

Lemon sugar cookies

So I recently decided to try out a new, somewhat healthy version of a sugar cookie because I'm testing recipes for a Halloween cookie (more on that to come!).  I found a healthier sugar cookie on Eating Well and decided to give it a try.  The dough ended up puffier than what I had liked for my specialty shaped Halloween cookie idea, but was perfect just for making regular round cookies.  Here's my slightly modified version of their cookies.

Ingredients
1 3/4 cups all-purpose flour
1/2 teaspoon baking soda
1/2 teaspoon cream of tartar
1/4 teaspoon salt
1 cup granulated sugar
4 tablespoons unsalted butter, softened 
1 large egg
1 tablespoon honey
1 tablespoon finely grated lemon zest (I used two little packets of True Lemon instead)
1/4 teaspoon vanilla
A few more tablespoons of granulated sugar

Directions
Whisk flour, baking soda, cream of tartar and salt in a small bowl.

Beat sugar and butter in a mixing bowl with an electric mixer on medium-high speed until light and fluffy. Add egg, honey, lemon zest, and vanilla extract, and beat until blended. Gradually add the flour mixture, beating on low speed just until combined. Cover and refrigerate the dough for 30 minutes or overnight. (Bolding because this is an important step to remember!)

Preheat oven to 375°F. Line 2 large baking sheets with parchment paper or nonstick baking mats.

Roll the dough into 36 balls (about 2 level teaspoons each) with your hands. Place 2 inches apart on the prepared baking sheets.  Smash the balls down slightly and then lightly sprinkle each one with the remaining granulated sugar.

Bake, one batch at a time, until puffed and beginning to crack, 6 to 8 minutes. Cool on the baking sheet for 2 minutes, then transfer to a wire rack to cool completely.

Nutrition

Per cookie: 59 calories; 1 g fat ( 1 g sat , 0 g mono ); 9 mg cholesterol; 11 g carbohydrates; 6 g added sugars; 1 g protein; 0 g fiber; 36 mg sodium; 15 mg potassium.
This was from my first batch. Note that I made my dough balls a bit too big on this one so I ended up with far fewer than 36 cookies!  I'll know what to do next time...

Tuesday, September 13, 2011

Somewhat Healthier Tator Tot Casserole

Given that it's not very fun to eat steamed chicken breast and broccoli each and every day, I'm all about variety in the food I make and in recipe makeovers for things that starting out aren't very healthy but can be lightened up with just a few tweaks.  I was browsing recipe sites as I tend to do, when I came across this recipe makeover for tator tot casserole. I had never heard of such a thing, but it sounded obnoxious and delicious all at the same time.  I kind of think of it as Americanized shepherd's pie.  

I made some further modifications to the recipe, including going back to actual tator tots versus the "smiles" things that they used. I discovered that, for some reason, the extra crispy tator tots are actually lower in calories than regular tator tots, so I used them in the recipe (extra crispy: 12 tots for 170 calories versus 160 calories for just 9 regular tots). I also added more veggies.  Overall, it's a pretty easy recipe.  And so tasty!

Ingredients: 
1 tablespoon canola oil
frozen tator tots (I used extra crunchy)

8 ounces mushrooms, coarsely chopped
1 pound lean ground beef or turkey (90% or higher)
1 large carrot, peeled and shredded (about 1 cup) (I just bought pre-shredded carrot and chopped it up some more)
One onion, chopped
Handful of peas (I used frozen)
A few garlic cloves, minced (I used 4, but I like garlic a lot!)
½ teaspoon black pepper
Kosher salt
One 10¾-ounce can 98% fat free cream of mushroom soup
One 10¾-ounce can filled with 1% lowfat milk (basically once you dump the soup into the pan, fill the soup can with an equivalent amount of milk and dump it in)
2 cups shredded reduced-fat Cheddar cheese, divided (I used Cabot's 75% light sharp cheddar cheese - it comes in a block, so I grated it extra fine) [Alternatively, you can use the pre-shredded reduced fat cheddar cheese.  When I did this, I just ended up using about 1 and 1/2 cups of cheese instead of 2.]


1. Preheat the oven to 350.

2. Heat the oil in a large Dutch oven or saucepan over medium-high heat.  Add the turkey or beef and cook until no longer pink.  Remove the meat from the pan and reserve it.  Turn the heat down to medium.

3. If there is a ton of oil there, drain most of it away.  If only a little oil, leave it.  Then add the mushrooms, onion, carrots, and garlic and cook, stirring frequently, until softened, about 5-10 minutes.  You especially want to make sure that the carrot isn't still crunchy.  At this point, dump the meat back into the pan.

4. Season with salt and additional pepper to taste.

4. Stir in the soup, milk, and, 1 cup of the cheese (the mixture will seem very thin at this point, but don’t worry). Heat, stirring frequently, until the mixture comes to a simmer. Remove from the heat.  Add the peas at this point.

5. Pour the meat mixture into a 13-inch baking pan or dish.  Of the remaining cheese, sprinkle all but about 1/4 cup of it across the top and then arrange the frozen tator tots over this into neat rows. Bake casserole in a 350 degree oven for approximately 30 minutes.

6. Then, raise the heat to 420 degrees.  Sprinkle the rest of the cheese over the tots and cook another 10 minutes, or until all cheese is melted and the tots are crunchy to your liking. 


The last time I made this recipe, I had pre-cooked shredded chicken left over so I used that instead of ground meat.  I have to say that I like the ground turkey better than the shredded chicken.  Because I used less meat, I had less filling so made this in an 8x8 pan.  It was still good though!

Friday, September 2, 2011

Banana Bread

As part of my effort to eat in a more healthy way, I've been trying to get more fruit in my diet. So, some weeks I'll buy a bunch of bananas and have a banana as part of my breakfast each day.  For some reason though, bananas ripen in my kitchen at an alarming rate (the AC is set to 72/73 so I am not sure why).  Sometimes by the end of the week, they inevitably get brown and nasty and not fit for consumption in their current form.  Enter...banana bread!  Banana bread is at its most awesome when it has really ripe bananas in it.  In fact, if you try to use unriped bananas it's bad news all around (trust me, I tried making muffins once with decidedly unripe bananas.  Not a good idea).

So without further delay, here is my recipe for banana bread, slightly adapted from this recipe from Cooking Light.  I adapted it to be even healthier than the Cooking Light people and I think it still tastes great.  (And my friend Joe agrees since he always eats it immediately when I make a batch!)

Ingredients 
1 cup all-purpose flour 
1 cup whole wheat flour (the last time I made it, I used 1/2 cup all purpose and 1 and 1/2 cups whole wheat and it tasted great.  So feel free to vary this.  I would hesitate to go all whole wheat in case it turns out too chewy though).
3/4 teaspoon baking soda 
1/2 teaspoon salt 
1 cup sugar 
1 tablespoon canola oil
1/2 cup unsweetened applesauce (if you buy the little cups, they are 4 oz each and therefore 1/2 cup)
2 large eggs or the equivalent in Egg Beaters
1 1/2 cups mashed ripe banana (about 3 bananas) 
1/3 cup plain non or low-fat Greek yogurt (like Fage)
1 teaspoon vanilla extract 
Cooking spray

Place sugar, canola oil, and applesauce in a large bowl, and beat with a mixer at medium speed until well blended (about 1 minute). Add the eggs, 1 at a time, beating well after each addition. Add banana, yogurt, and vanilla; beat until blended. Add the salt and baking soda and mix well.  Add flour a little bit at a time; beat at low speed just until moist. 

Spoon batter into an 8 1/2 x 4 1/2-inch loaf pan coated with cooking spray. Or evenly distribute into a pan that makes several miniature loaves (I have one, and it's great for meatloaf too!).

Bake at 350° for 1 hour or until a wooden pick inserted in center comes out clean. Cool 10 minutes in pan on a wire rack; remove from pan. Cool completely on wire rack.

My mini loaf pan.  This is after I removed some loaves. 


Delicious mini loaf.  Good at breakfast or for a snack!

Monday, August 22, 2011

Chicken pot pie

When I made the decision to start eating things that were better for me, one of the first books I bought was Eat This, Not That!  Some people (skinny people who can eat whatever they want and not gain an ounce) are always highly critical of overweight people and the food options they choose. "It's not so hard to eat healthy, dumbass," they say, condescendingly.  "Just don't eat Big Macs and fries every day."  OK, yes, Captain Obvious, we all know that certain foods are most definitely bad for us.  But it's really hard, especially when eating out, to know sometimes how bad something is for you.  (I'm hoping that will change once all chains will be forced to put calorie counts on the menus!)  And some menu items are most definitely eye opening.  I read Eat This, Not That and was sick to my stomach at how obnoxiously high in fat some menu items are, even some that look innocent and healthy, like a grilled salmon salad.  Sometimes you really have no idea how much crap (usually, butter and cheese) they put in this kind of food. No wonder we are all fat.

After reading that book, I went and bought Cook This, Not That!, which basically offers healthy recipes you can make at home to replace those high calorie versions at restaurants.  Compared to some of the other eating healthy books I own, these authors are more likely to tell you to use full fat cheese, butter, peanut butter, and milk and just use less of it.  That's one way to go I suppose.  The recipes I've tries so far have mostly been great, with the mac and cheese the only disappointing one.  Totally not enough cheese in that.

Recently, I made the chicken pot pie out of this book for the second time and I think it came out even better than the first time.  Here it is below, with my alternations.  (Click the link if you want to see the original recipe from the book.)

Ingredients
2 Tbsp butter
1 large onion, chopped
2 carrots, chopped into smaller pieces
3 cloves garlic, minced
2 cups stemmed and quartered white or cremini mushrooms
2 cups chopped cooked chicken (leftover or pulled from a store-bought rotisserie chicken)
1/4 cup flour (I used whole wheat)
2 cups low-sodium chicken broth, warmed
1 cup 1% milk
1/2 cup fat free half-and-half  (I used Land O' Lakes)
1 cup frozen peas
1/2 cup frozen corn
Salt and black pepper to taste
1 reduced fat version crescent roll tube (like Pillsbury)
2 egg whites, lightly beaten (I used Egg Beaters instead, which is basically the same thing)

How to Make It:

*Heat the butter in a large saute pan or pot over medium heat. When it's melted, add the onion and carrots,  and cook until the onion is translucent and the carrots begin to soften, about 5 minutes. Add the garlic and mushrooms and cook, stirring occasionally, for another 5 minutes. Stir in the flour, using a wooden spoon to ensure the vegetables are evenly coated with flour.  Let cook at least one minute to cook the flour.

*Slowly pour in the chicken broth, using a whisk to beat it in to help avoid clumping with the flour (having the broth warm or hot helps smooth out the sauce). Add the chicken. Once the broth is incorporated, add the milk and half-and-half and simmer for 10-20, until the sauce has thickened substantially and lightly clings to the vegetables and chicken. Depending on your milk and half and half, this may take even longer.  Just be patient.  It'll thicken!  Stir in the peas and corn. Season with salt and pepper to taste.


*Preheat the oven to 375F.  Take the crescent roll dough out of the tube and break it up into four pieces. Roll out each piece to make a 6" square.


*Divide the chicken mixture among 4 ovenproof bowls* (I used my ramekins). Place the pastry square over the top of each bowl and trim away the excess with a paring knife; pinch the dough around the edges of the bowl to secure it. Brush the tops with the Egg Beaters and bake until golden brown, about 15-25 minutes.


Makes 4 servings

The original recipe has 350 calories per serving.  I'm not sure what it is with my alterations!


Fresh from the oven!  It'll be hot!

Mmmmm tasty


*if you didn't invest in ramekins like I did, just put the whole thing into a 8x8 glass baking pan and roll out the pastry to make one big crust for it, dividing it into four portions once cooked.

Wednesday, August 3, 2011

Slightly better for you strawberry cupcakes

People who know me probably know that I'm not big into desserts. That is, after I eat my entree I hardly ever have any desire to eat any more food.  But that's not to say that I hate sweets - quite the contrary, actually. I just prefer to eat my sweets as separate snacks, when I'm actually hungry.  But of course many sweets have the evil trinity of too much sugar, fat, and carbs, all in one delicious little package.  There are methods to decrease elements of this evil trinity, of course - using applesauce or Greek yogurt in place of oil, switching out all purpose flour for whole wheat, and using less sugar.  And I've utilized all of these with great success.  As I continue my journey to trying to eat better, I'm hearing "experts" on all sides telling me what's good and what's bad, to stay away from "processed" foods at all costs and that artificial sweeteners are bad for you.  It's all quite confusing and contradictory.  And personally, I say that even the unbiased, relatively objective research is still mixed on artificial sweeteners, not even to mention the highly biased research that's also out there.  So, in the meantime, I will continue to enjoy them.  If you are steadfastly against all artificial sweeteners, that's your choice.  And you probably should skip this recipe.

Hungry Girl is all about the artificial sweeteners but she's also about increasing fiber in your diet naturally and bulking up meals with vegetable "fillers" like cauliflower so that you can fill your plate and still eat less calories. For these second two reasons, I'm willing to give some of her wackier recipes a try.

One thing she is known for is taking regular old boxed cake mix and adding diet soda to it to make cake.  Just diet soda - no egg, oil, or water.  The diet soda you use should gel well with the cake you are making - apparently diet cherry Coke is great with chocolate cake.  She has several variations of these concoctions and I decided to take two of her variations and combine them into a new recipe that I just kind of made up: strawberry cupcakes with strawberry frosting.

Ingredients for the cupcakes
Half of an 18.25-oz. box (about 1 3/4 cups) moist-style yellow cake mix*
1/2 tsp. baking powder
8 oz. of sugar free Sprite
1/2 teaspoon of vanilla extract
1 teaspoon of strawberry extract
red food coloring (optional, and really just to make the batter pink)

Preheat oven to 375.  Prepare a cupcake pan with 12 cupcake liners. Mix all of these ingredients together in a bowl and then pour.  It should make 12 cupcakes, more or less.  Bake about 20 minutes, or until toothpick inserted in the middle of a cupcake comes out clean.  Let cool.

Meanwhile, prepare the frosting.  You'll need:
1 cup Cool Whip Free, thawed
3 teaspoons sugar free strawberry preserves
1 and 1/2 tablespoons Jell-O Sugar Free Fat Free Vanilla Instant Pudding Mix
More strawberry extract (optional, to your taste)

Mix these together in a bowl and then chill in the fridge, at least an hour.

Once chilled and the cupcakes are cool, lightly spoon the frosting onto the cupcakes.  Note that this frosting isn't very room temperature stable so you'll need to store the cupcakes in the fridge until you eat them.  They are quite delicious!


Note: since making this recipe I found this mysterious powder at the store that's meant to stabilize whipped cream used in frosting so it holds its shape at room temperature.  I wonder if it will work for this frosting as well?  I'll have to try when I make these again!

*or you know, you can just buy strawberry flavored cake mix.  I just happened to already have half a box of the yellow cake mix in the pantry.

Tuesday, July 12, 2011

Hot and Sour Soup

So the soup theme continues...
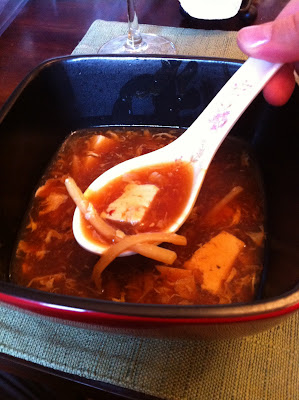
My successful hot and sour soup!
When Joe gets a hankering for Chinese food, there's usually just about 3 things I like on the menu: crab rangoon, Singapore noodles, and hot and sour soup.  Lately, while he gets a big entree of lo mein noodles and General's chicken, I'll just order a large hot and sour soup and make that my dinner (usually saving leftovers for lunch the next day!).  A few years ago, I decided to make the soup at home and so went onto my friend Google to see how it's done.  I quickly ran into a huge problem: every single recipe claimed to be the real deal and every single one had drastically different ingredients.  I went through pages and pages of results. Frustrated, I finally picked a recipe that seemed to have the largest number of ingredients mentioned in other recipes.  I made the soup.  And it tasted (and looked) nothing like hot and sour soup. Damnit.  Frustrated, I gave up.

That is, until I saw this recipe in our local Indy week newspaper.  The recipe came straight from a local restaurant, Super Wok, so it had to be better, right?  So after tracking down the ingredients, I made it. And damn if it didn't taste like the real deal!  So triumphantly, I present to you that recipe but with my modifications.

Super Wok's hot and sour soup recipe

200 grams (about a half block) soft tofu (got it at the Asian mart, but available in just about every supermarket)
100 grams (about 1 cup) canned bamboo shoots, precut into matchsticks, drained (again, most supermarkets carry this)
20 dried wood ears (i.e., ear-shaped fungi) (supermarkets often have these in little plastic containers hanging above the fresh mushrooms in the produce section)
15 dried arbol chilies (already had these from making chili powder. You can find them in the Hispanic section of your supermarket)
3 tbs. canola or vegetable oil
7 cups unsalted chicken stock, preferably homemade (I didn't want to use up all my homemade broth on one recipe, so I used one carton of store bought chicken stock and one carton of chicken broth)
1/2 cup white rice vinegar (again, Asian section of grocery store)
1/3 cup soy sauce, preferably Kikkoman brand
1 tbs. dark soy sauce (I had to go to the Asian mart for this)
2 tbs. Shaoxing cooking wine (I had to go to the Asian mart for this)
1 tbs. sesame oil (supermarkets have this)
2 tsp. MSG, preferably a quality Japanese brand like Ajinomoto (I actually picked up a small bottle of this at the Mexican mart El Superior)
2 tsp. chicken bouillon powder (I had cubed chicken bouillon so I just used this)
1 tsp. Chinese white pepper powder (I used regular black pepper)
5 tbs. tapioca starch (found at the Asian mart, but Joe claims you can get this at the regular grocery)
5 tbs. room-temperature water
2 large eggs, well beaten
Kosher salt (to taste)  (my soup really did not need any extra salt at all so don't even think of adding this until the soup is completely done and you taste test)

Place the chilies in a bowl of boiling water. Soak for three hours, letting the water gradually cool. Drain and finely chop. Heat a pot of oil to 350 degrees and add 3 tablespoons to the chopped chilies. Set aside.
Hydrate the wood ears in a bowl of water for one hour, drain and roughly chop. Cut the tofu into inch-long rectangular blocks.

Bring the stock to a boil. Add the vinegar, soy sauces, wine, sesame oil, MSG, chicken bouillon powder, white pepper powder, wood ears, tofu and bamboo shoots. Add 1–2 tbs. of the chili and oil mixture (1 tablespoon gives a kick, 2 is super spicy). Return to a boil.

Fully dissolve the tapioca starch in the water and stir into the soup. The soup will quickly thicken and assume an attractive sheen.

Drizzle the egg into the soup in a thin, steady streamlet, forming concentric circles. Allow the egg to set for about 15 seconds and give a gentle clockwise swirl with a spoon or spatula to produce attractive ribbons. I thought that 2 eggs was a good amount for the soup but Joe thought it was too much.
Taste and add salt as necessary (in all likelihood, no salt will be necessary). 


As I said, it turned out great.  It tastes just like the real deal you get at restaurants. 


I'm wondering if the method for the chiles is really necessary.  There's plenty of other ways to add the spiciness to the soup.  Also, one local restaurant I frequent doesn't even use wood ear mushrooms - they use regular button mushrooms!  And the soup doesn't seem worse for wear because of it.  I make this point only because if you eliminate those soaking steps for the chiles and wood ear mushrooms, the soup could come together in 20 minutes... of course, I can't say at this point if it will really still taste the same.